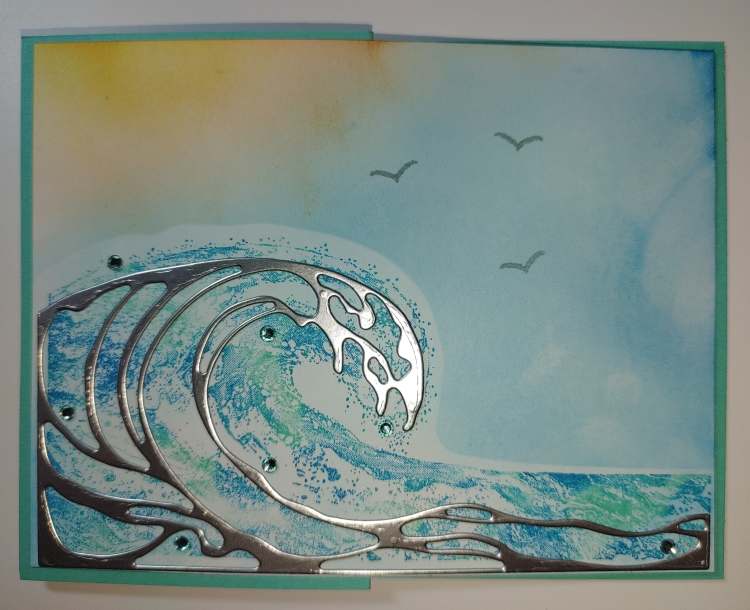
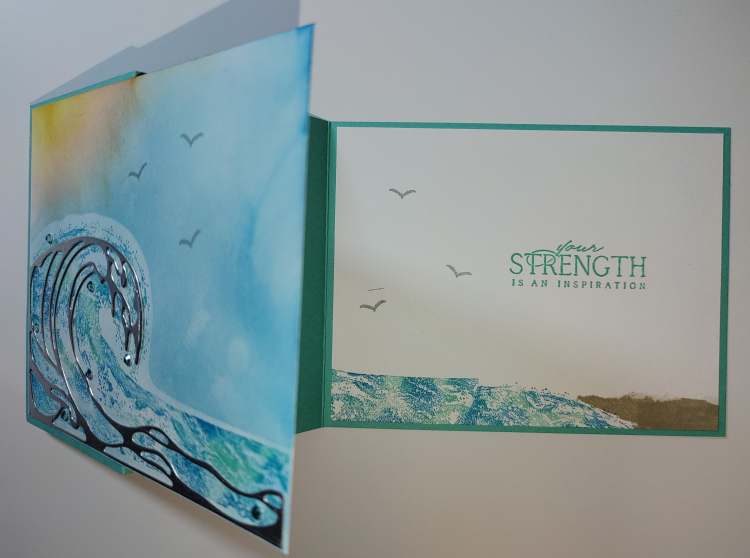
On March 20, 2022, I showed various ways to use the products in the Waves of the Ocean Suite. For the card pictures below:
- I began with a piece of 4 ¼” x 11” of Costal Cabana cardstock scored at 2 ¾” & 5 ½” & 3 pieces of 4 ⅟₁₆” x 5 ⁵∕₁₆” of white cardstock.
- I took one of the white cardstock pieces and traced the inside of the wave stamp from the rubber piece the stamps are punched out of, then cut it to make a template. I lightly adhered the template to the front of another piece of the white cardstock where I wanted my wave stamp to eventually go.
- Using the blending brushes, I inked up the sky area in Pacific Point, Daffodil Delight and a touch of Pumpkin Pie. I removed the template to reveal just white.
- Taking the wave stamp (mounted on a block), I inked it up using the Sponge Daubers randomly all over in Coastal Cabana and Pacific Point. I huffed the inked area lightly and stamped the white area on the card front.
- Using the same technique on various parts of the wave, I stamped the last piece of white cardstock to make it appear like the edge of the shore.
- I used the sand stamp from the Oceanfront stamp set with Sahara Sand ink to complete the bottom.
- I stamped seagulls on the front & inside pieces and a sentiment on the inside piece.
- I folded the card base in a “Z”. Then adhered the inside stamped piece to the 4 ¼” x 5 ½” inside right of the card. Then I adhered the back left of the outside stamped piece to the front of the “Z”, make sure you cover the inside piece completely (they should line up).
- I adhered a scrap of the Adhesive Sheet to the back of a piece of the silver sheet of the Blue Foils and cut a wave piece using the dies, then adhered it to the wave on the front cover.
- I finished off with a few of the gems from the Rhinestone Waves Basic Jewels.
")


Pacific Point Classic Stampin’ Pad
[126951]