Waterfall Card
design by Vy Tran
These directions have been adapted to use panels of your choice
Supplies Needed:
Colored cardstock
- 4 ¼” x 11”, scored at 5 ½” along the long side
- 2 ¼” x 10 ¼”, scored at 3 ¼”, 3 ¾”, 4 ¼”, and 4 ¾” along the long side
- 4” x 1”
Basic White cardstock
- 3 ½” x 4 ¾”
- 2″ x 5 ¼”
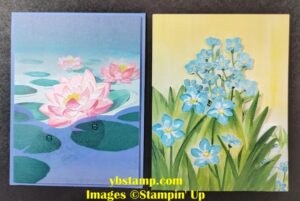
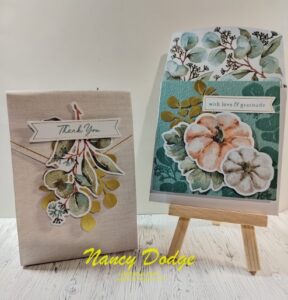
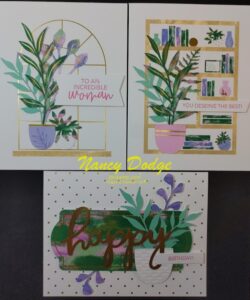
Portrait stamped images
- FOUR 2 ½” x 3 ¼” panels
Coordinating DSP
- 4 ¼” x 5 ½”
- 2 ½” x 3 ¼”
- 3 ½” x ½”
Directions:
- On smaller white cardstock mark ⅝” and 3 ⅝”, stamp sentiment between those markings, a small image below lower marking, then erase marks.
- Reinforce scored lines on small cardstock
- Put your images in order & beginning with the last image, glue it to the shorter side of the cardstock
- Put glue on to the scored section above that (2 ¼” x ½”) & adhere the 2nd to last image, then the next, then the cover image
- Glue 4” x 1” piece of cardstock to the back/bottom/centered of the assembly
- Open assembly & adhere the stamped white cardstock piece from #1, centered & at the bottom of the longer side, leaving an even border
- Adhere DSP to front of card base
- put glue on the back of the wings that stick out (*ONLY glue the part that sticks out) from the assembly & adhere to card front in portrait position
- Add an embellishment to each side of the wings so it looks ‘tacked’ down
- Add the 3 ½” x ½” strip of DSP to the bottom of the 3 ½” x 4 ¾” piece of white cardstock, about ½” from the bottom, then adhere to the inside of your card
- Take a scrap of cardstock about ½” x ½” and adhere a dimensional, peel of backing and adhere just under the pull tab, this makes it easier to grab the tab